Christmas Light Installation Carver Mn Can Be Fun For Everyone
Table of ContentsChristmas Light Installation Carver Mn Can Be Fun For Everyone10 Easy Facts About Christmas Light Installation Carver Mn ShownChristmas Light Installation Carver Mn - The FactsNot known Details About Christmas Light Installation Carver Mn
Brush away snow and also debris from the surfaces where you wish to set up the clips. Put a quarter-sized quantity of caulking on each spot where you wish to put a clip and afterwards push the clip into area. Make certain that you have spaced the clips equally according to your dimensions and mounted the clips to make sure that the light bulbs will certainly be encountering in the best instructions.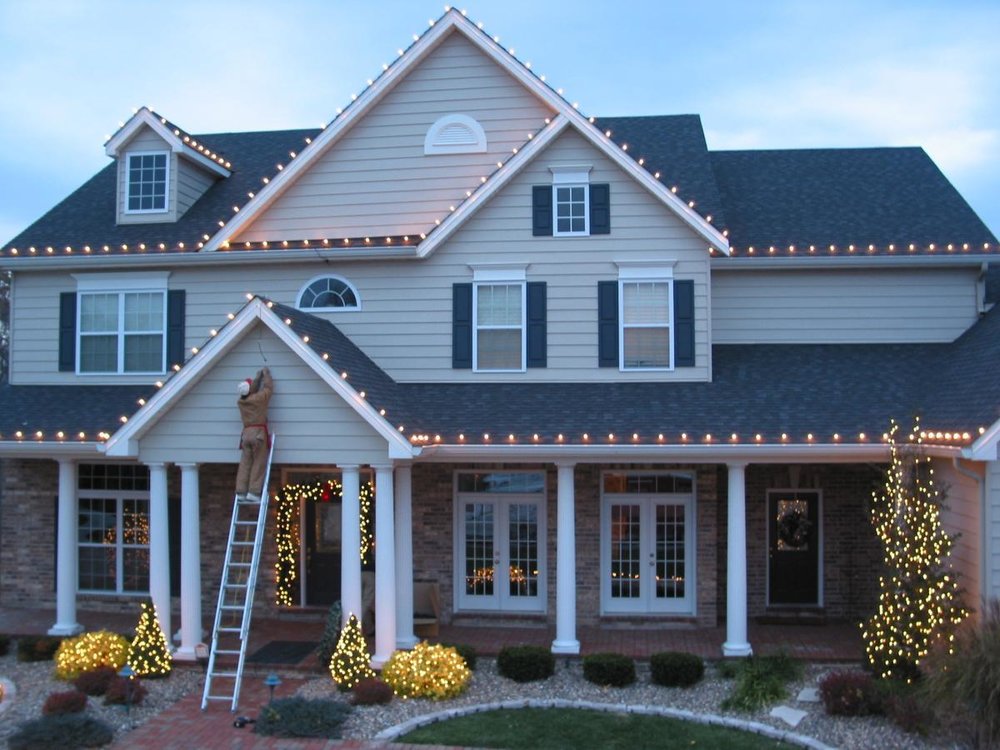
Order the proper hair of lights, covering it freely around one arm, and also climb the ladder to where you intend to hang it. Carry extra clips in your pocket. Remember where the pronged end of the strand will need to be plugged in or connected to the next hair.
Area each light bulb on the hair inside a clip. Hold each area of lights tight in between the clip factors. Also if you are making use of mini lights as opposed to C7 or C9 lights and have already set up the clips inside, you still might require to attach additional clips when hanging lights around exterior corners.
If you are using C7 or C9 lights as well as have actually caulked the clips to the exterior of the building, leave the clips in position after getting rid of the lights so that you can use them for hanging lights once more following year.
Some Ideas on Christmas Light Installation Carver Mn You Should Know
The yearly job can be made basic by planning in advance., shares his top 5 hacks on just how to hang your outside Xmas lights.
'To achieve one of the most remarkable effect, one of the more crucial things to think about is the distance between each hook,' explains Adam. 'Try to position every one at regular intervals, leaving adequate area to enable slack. If you're developing an icicle result, room the hooks closer together to ensure that the weight of the lights is extra supported.' Have you ever attempted this prior to? A wonderful means to stay clear of pulling on the outlet, all you require to do is take the end of the string of lights and connect right into the source of power (guarantee it's weather-resistant).
Network Bridge and Wireless Receiver Setup With the Bridge attached, you currently require to pair any cordless receivers you have. Make sure to follow this action in close closeness to the Bridge to guarantee an easy link (Christmas Light Installation Carver MN). To place the bridge in pairing mode, press the black switch on the back of the bridge.
To put the cordless receiver in pairing setting, use the consisted of wire-nuts to connect a power supply and also connect the wireless receiver right into an electrical outlet. Like pushing the pairing button on the Bridge, connecting the wireless receiver right into power will place it into matching setting for two minutes. It does not matter what order you do this in, it just matters that both systems are in pairing setting at the very same time.
The 6-Second Trick For Christmas Light Installation Carver Mn
Adhere to the guidelines on the screen to combine your areas. Wireless Receiver Installation The Wireless Receiver links straight to the lights and also tells them what to do by obtaining a radio frequency radio signal from the bridge at distances approximately half a mile. It is always best to set up the cordless receiver on one end of the home or another.
In the suitable circumstance, an eave outlet or other source of power will be offered on one end of the house. If no power is conveniently available, the garage is typically the most effective location for the wireless receiver. Wherever you are able to install the cordless receiver, make certain it is linked straight to the power supply with 2 of the included pink butt splice ports.
Instead, connect the wireless receiver directly alongside the power supply, attach a data barrier to the output cords of the cordless receiver, and run unlit cable to where your lights start. An information barrier is important to send out a strong information signal and also will certainly be talked about comprehensive below.
Make sure the wireless receiver is installed in a completely dry place as it is splash immune yet not water resistant. Also guarantee the wire linking the lights to the wireless receiver blog has a drip loop to avoid water from running down the line as well as directly into the wireless receiver. Up to 20 wireless receivers can be paired to a single Ever, Lighting Bridge, nonetheless they should never be wired into the very same strand of lights.
Getting My Christmas Light Installation Carver Mn To Work
Each light has an arrowhead published on the behind of the covering. Ever, Lights make use of a 4-wire wire.
Inaccurate connections can be extremely aggravating to situate as well as fix later on, it is much far better to spend the extra time dual monitoring cables prior to moving on than to come back later on. For an extra layer of self-confidence, trace any type of cut cables back to the covering as well as validate the Ever before, Lights wire is attached to the +5 v section of the PCB (Christmas Light Installation Carver MN).
Merely having the lights switched off in the app is not sufficient, they should be totally powered down. With power detached, cut as well as splice at any type of indicate customize the lights to your distinct roofline. Y-splits can be placed at any point to carry the lights on in two directions.
